1. VSCode 다운로드
> VSCode 홈페이지에서 다운로드 진행
* 한글 변경 방법
: ctrl + shift + p 로 검색창 실행 > language로 검색해서 Configure Display Langage를 선택 > 한글선택하여 다운로드
2. 하기의 Extension Pack과 lombok 다운로드 후 VSCode reroad

* lombok은 어노테이션 관리해주는 라이브러리로, 반복되는 getter, setter, toString .. 등의 반복 메서드 작성 코드를 줄여주는 코드 다이어트 라이브러리이다
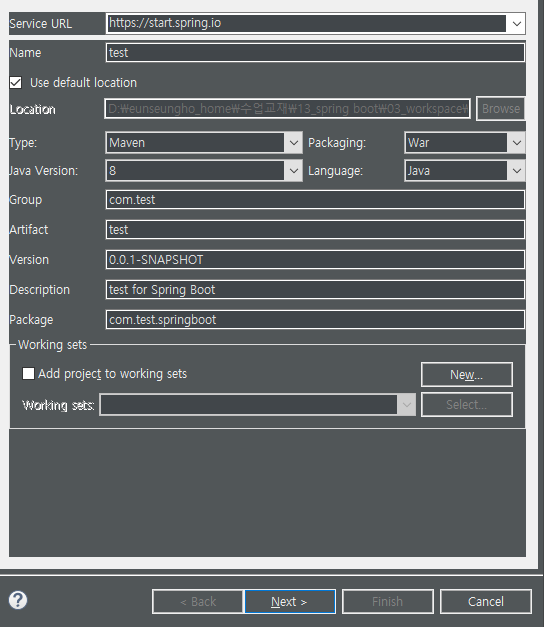
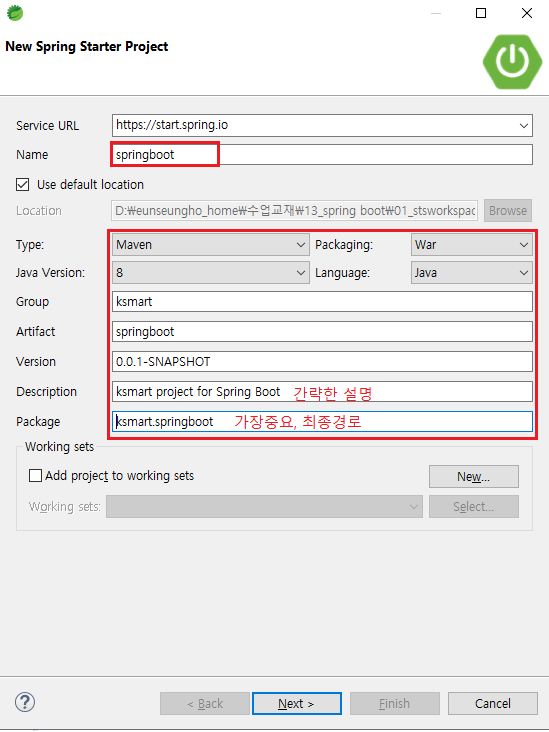
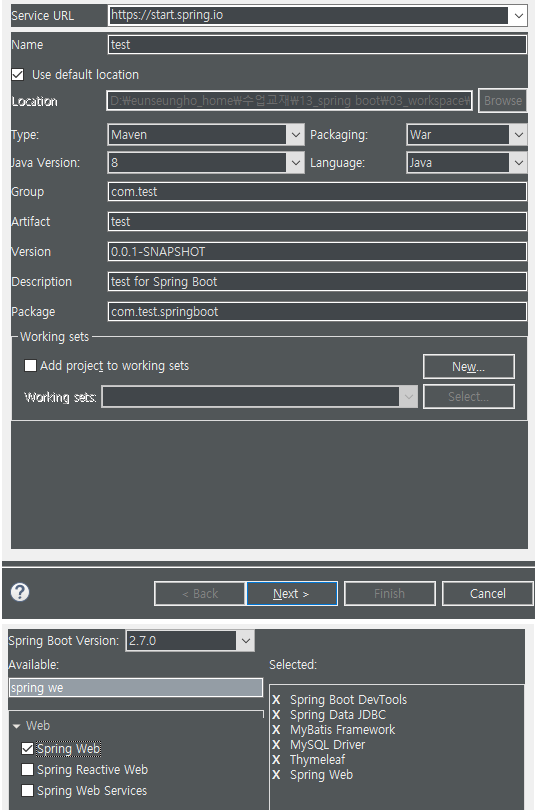
3. spring project 생성
> ctrl + shift + p 로 검색창 실행 > Spring initializr 검색하여 gradle or maven 프로젝트 생성
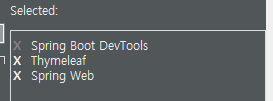
> 버전, 패키지명, 타입 등 선택하고 dependency 추가하여 생성
* 기본적으로 교육 당시에 하기와 같이 dependency 사용햇엇음 필요한부분 찾아서 추가/삭
4. pom.xml과 application.property 수정
(아래는 교육기관에서 사용햇던거고 변동사항이 생기면 이부분도 바꿔야댐)
> pom.xml에 추가 의존성 주입
<!-- https://mvnrepository.com/artifact/org.bgee.log4jdbc-log4j2/log4jdbc-log4j2-jdbc4.1 -->
<dependency>
<groupId>org.bgee.log4jdbc-log4j2</groupId>
<artifactId>log4jdbc-log4j2-jdbc4.1</artifactId>
<version>1.16</version>
</dependency>
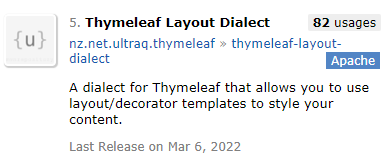
<!-- https://mvnrepository.com/artifact/nz.net.ultraq.thymeleaf/thymeleaf-layout-dialect -->
<dependency>
<groupId>nz.net.ultraq.thymeleaf</groupId>
<artifactId>thymeleaf-layout-dialect</artifactId>
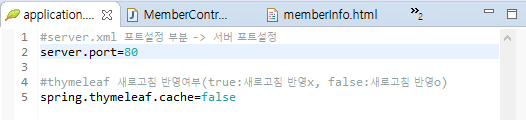
</dependency>> application.property 설정
#server port 설정
server.port=8080
#thymeleaf 새로고침 여부
spring.thymeleaf.cache=false
# DB 연결정보 설정
spring.datasource.driver-class-name=net.sf.log4jdbc.sql.jdbcapi.DriverSpy
spring.datasource.url=jdbc:log4jdbc:mysql://localhost:3306/testdb?serverTimezone=UTC&characterEncoding=UTF8
spring.datasource.username=testid
spring.datasource.password=testpw
#mybatis 설정
#mapper xml 파일 위치 경로 설정
mybatis.mapper-locations=classpath:mapper/**/*.xml
#DML 동작 후 결과 DATA 매핑을 위한 DTO 축약 설정
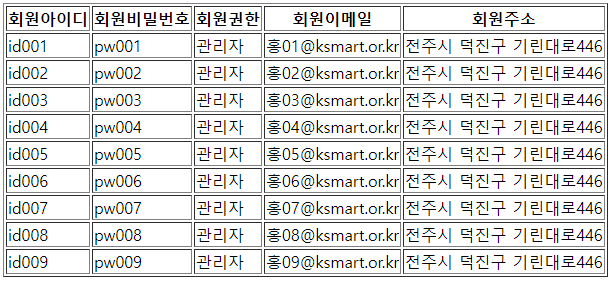
mybatis.type-aliases-package=com.test.board.dto5. 프로젝트 빌드
> MAVEN에서 프로젝트 우클릭 후 package 선택하여 프로젝트 필드

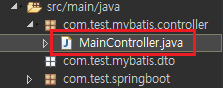
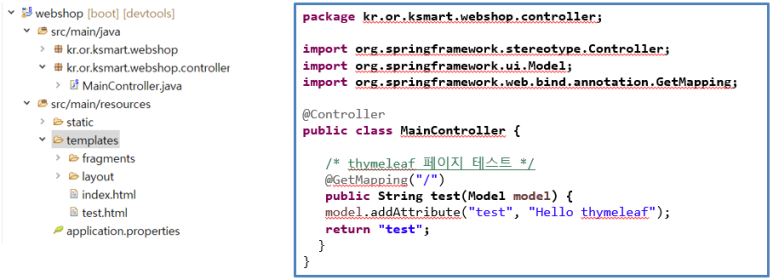
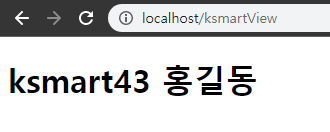
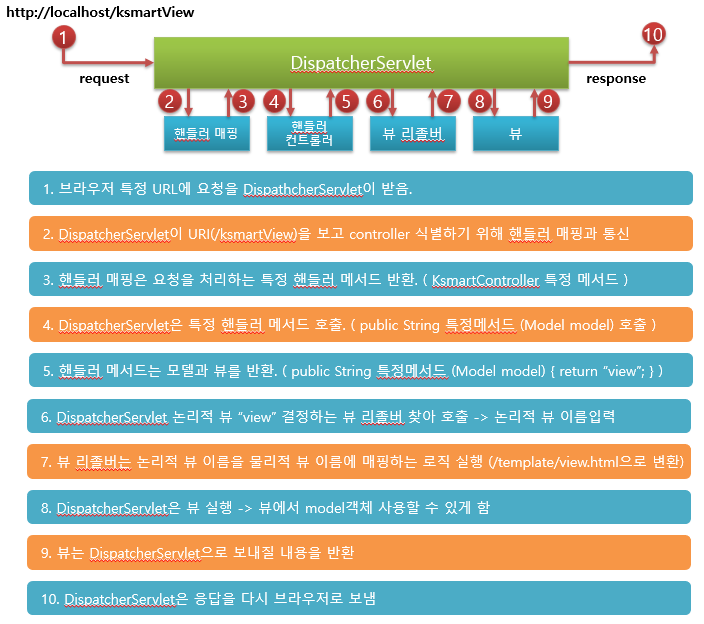
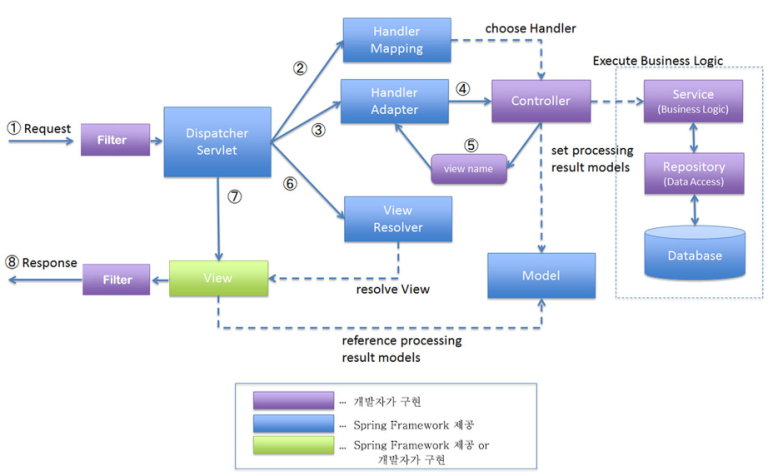
6. maincontroller 잡기

>> main 폴더 내에 패키지 경로 폴더 하위에 controller 폴더 생성
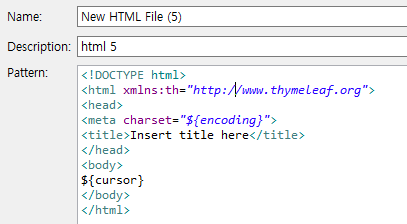
>> resources 폴더 내에 templates 폴더에 메인페이지가될 html파일 생성
>> 실행하여 잡혓는지 확인


'springboot' 카테고리의 다른 글
| Spring-Boot 환경설정 (0) | 2023.05.15 |
|---|---|
| thymeleaf로 레이아웃 관리(fragment) (0) | 2023.05.15 |
| thymeleaf(타임리프) (0) | 2023.05.15 |
| Spring - Maven (0) | 2023.05.15 |
| 스프링부트(Spring Boot), Spring MVC (0) | 2023.05.15 |